Track my order
RESOURCES
How to Build a Shipping Container Home: A Complete Step-by-Step Guide
Interested in building a tiny home from shipping containers? Start with our comprehensive guide to building a shipping container home.


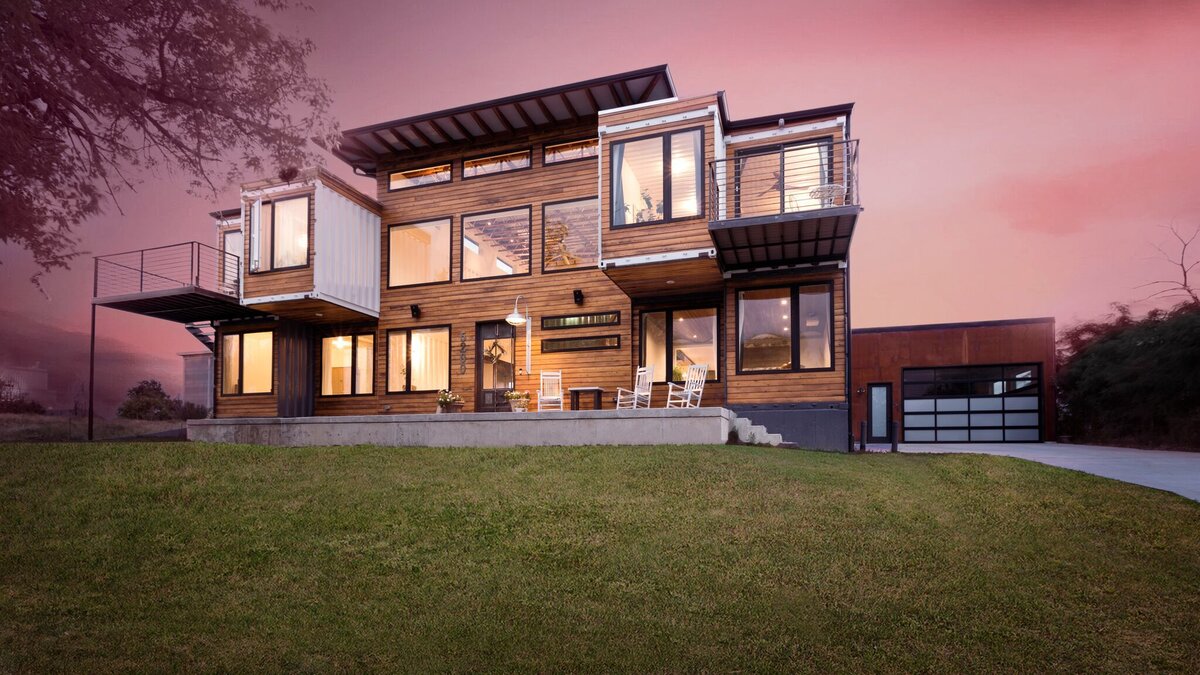
Whether for income generation or finally living on your own terms, you want a different kind of home.
A shipping container home might just be the perfect solution.
After retiring from ocean-going shipping barges, self-storage facilities, or other industrial uses, shipping containers are strong enough to withstand anything residential life can throw at them. They’re also incredibly versatile — you can place them on almost any plot of land — and they typically cost far less than a traditional home.
If you’re thinking of buying a shipping container and turning it into the home (or unforgettable Airbnb) of your dreams, you have an exciting journey ahead of you.
To better understand how to build a shipping container home step-by-step, read this guide below (and don’t be afraid to keep it bookmarked; you’re always welcome to refer back to it).
Before You Get Started
As with any real estate purchase, there are some things you need to do before you start shopping or send in the down payment.
Plan Your Lifestyle
What do you actually want out of your new home? What lifestyle do you want — both at home and traveling? While only you can identify your specific needs, here are a few prompts to think about:
Airbnb hosts: Do you want this to be a complete guest DIY with a cleaning service, or are you ok managing the process and welcoming guests?
Empty nesters: Are you planning to age in place, or is this a way for you to be more active and travel?
Off-grid living: Is this your permanent home, a nomadic base, or a vacation property?
Your answers to these questions provide a foundation that makes the rest of this process a little easier.
Think About Location
Based on your desired lifestyle, you’ll need to pick where you want to live. If you already own land you want to use, double-check that it fits your lifestyle goals.
For example, an Airbnb needs to be in a place travelers are willing (and able) to visit, meaning road or trail access. Empty nesters who love to travel, on the other hand, might want a suburban or semi-rural area that’s near amenities like transit or airports. Off-grid-ers need to be in places where disconnecting from the grid is legally (and functionally) possible.
On top of use-case variables, you should also think about lifestyle variables like family access, community, and local amenities you might want nearby (e.g. “a grocery store within a 10-minute drive”).
Note: You just need a general idea of location, since actually shopping for land will solidify things.
Design Your Dream Layout
Container homes are small so you need to get creative with floor plans — but that’s part of the fun! If you need some inspiration, check out this Pinterest board of amazing container home floor plans and designs.
As you think about your ideal layout, don’t forget the big elements of container home living:
1. Creative storage solutions.
2. Loft spaces (especially for beds).
3. Multi-functional spaces (e.g. movable furniture so a room can be both living and dining).
Keep in mind that you can also connect multiple containers to create a bigger first floor or even set up a two-floor home. Just be aware of what that means for wall space or space to add stairs.
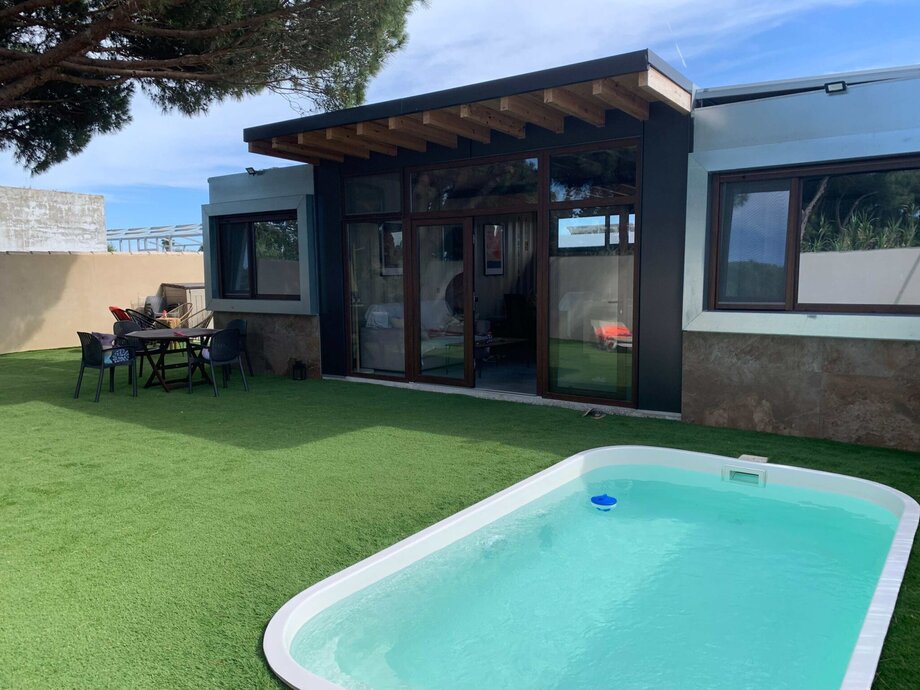
An environmentally-friendly holiday home made from recycled shipping containers. Chiclana de la Frontera, Spain.

Tip: Designing Your Floor Plan
Most container homes are either 20ft or 40ft long. But within that, you need to leave some space for things like insulation — we recommend about 6 inches per side. That means, for instance, within a 20ft container you have 19 feet of interior room space.
Check Out Local Building Regulations
Every state and city will have specific building regulations that you’ll need to follow when planning a new construction—this includes building a shipping container home.
Look up what regulations you’ll need to follow and what building permits you’ll need to apply for ahead of time. If you’re open to moving states to build your container home, check out Boxhub’s guide to the states that allow container homes.
If you’re planning on being an Airbnb host, you’ll need to confirm that Airbnbs are allowed where you plan to build (and if there are any additional registration fees you need to be aware of).
Start Tracking Your Money
Shipping container homes can be purchased, shipped, and built for under $50,000 (sometimes under $25,000) — dramatically lower than the national average house price for 2022, which sits at just over $428,000.
Of course, that doesn’t mean you can just spend and not worry about it!
We highly recommend having a basic spreadsheet where you track the vendor, expense category, who purchased the item, expense purpose, total amount, applicable taxes, and notes.
Why, you may ask? For Airbnb hosts, it’s for business purposes—taxes and profit & loss calculations. But for empty nesters and off-grid living, tracking expenses is a way to see where your money is going. Whether this is for personal finance goals (e.g. FIRE) or decreasing your overall consumption, knowing your spending levels can help support other lifestyle goals.
Laying Your Foundation
Lifestyle? Check. Budget? Check. Dreamy floor plans? Double check. Now it’s time to start the buying process.
Purchase The Land
You have two main options for finding land to purchase: DIY research on sites like Realtor.com and Zillow or getting in touch with a realtor. Either can work. DIY research has the pitfall of taking more time, but can be exciting. Finding the right realtor, on the other hand, might take a while — but a good partner can help you find deals you won’t find by yourself.
In either case, you need to think about a few things:
- Your lifestyle goals, including amenity access and general location.
- Whether the land is “raw,” meaning you need to hook up sewer, water, and electricity systems (either to the main supply or finding your own, like a well for water and solar panels for electricity).
- Delivery feasibility (Rural areas are typically easier for shipping container delivery since they offer plenty of space to maneuver.)
When you’re ready to buy, you will also likely need a lawyer involved to process the paperwork. Don’t forget to add all these costs to your financial tracking sheet!
Buy Your Shipping Containers
Once you have land, you can start container shopping! How many containers you buy depends on how much space you want:
- A 20-foot standard container should give you about 320 square feet of living space.
- A 40-foot standard container provides 640 square feet.
For people with vertical designs (e.g., a loft bed area), you also need to consider height: a standard container is 8’6” while a high-cube container is 9’6”. One issue to note is that 20-foot high-cube containers are very popular and thus are more difficult to source. However, 40-foot high-cube height containers are fairly easy to find.
If you’re building a tiny home, you may only need one container. If you’re planning a larger, multi-level build, you will need multiple containers.
Regardless of the scale of your home construction project, we recommend choosing new “one-trip” shipping containers as the basis of your build. For a detailed breakdown of all the container sizes and grades available to you, consult our container buying guide.

Tip: Use New "One-Trip" Containers
One-trip containers have only transported a single load of dry goods across the ocean. As a result, they require no upfront maintenance or painting.
Prepare Your Land
Before you get your shipping containers delivered, survey the area to find the best spot to build on. Here are two key details to think about (and possibly talk to a contractor about):
1. Grading the land: Ensuring your building plot is not only level but secure, so the home doesn’t sink or slide. This is usually done with a soil analysis (e.g. if the soil has too much moisture, you might need to bring gravel in to ensure the land doesn’t shift under the container).
2. Pick your foundation: We recommend a concrete slab, concrete strip, pile, or pier foundation.
For more information on these four options, check out Boxhub’s guide to building a foundation for shipping container homes.
Plan For Your Shipping Container Delivery
Once the land is ready, it’s time to plan for delivery.
If you’re working with Boxhub, that usually means your container will be delivered within 5 business days. You’ll benefit from the largest trucking network for container deliveries in the U.S. — our drivers are experienced and can place the container wherever you want it.
Regardless of who you work with, though, always check the container for unexpected wear and tear upon delivery (e.g. a hole in the container or a large patch of rust you weren’t expecting).
For more insight, check out Boxhub’s guide on what to expect from shipping container delivery.
Turning Your Shipping Container into a Home
Now it’s time to start building your shipping container home. Whether you hire contractors to conduct the work or take on the project yourself, constructing a container home includes the steps below.
Add Openings
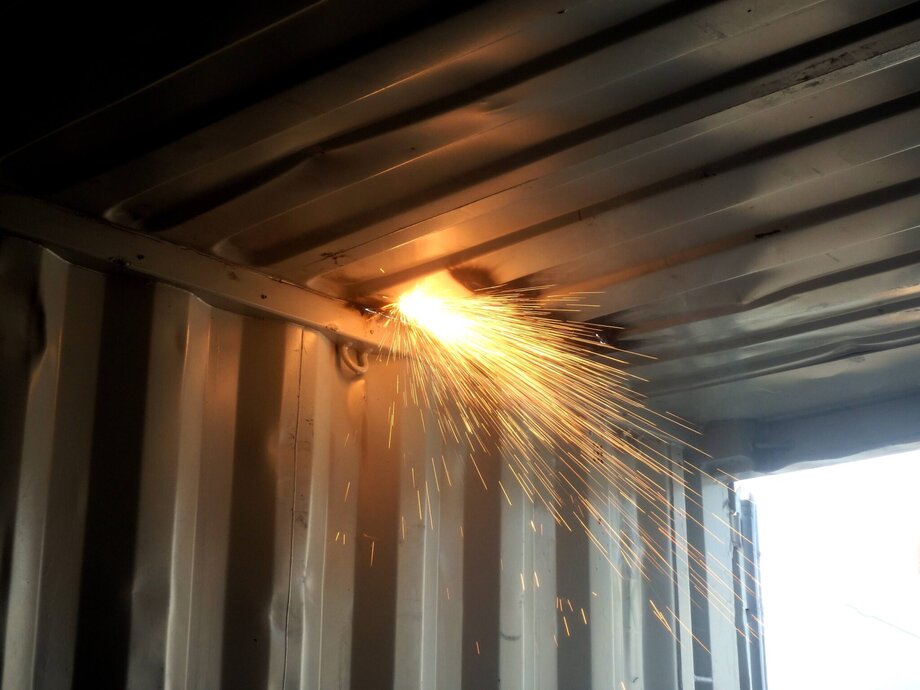
Openings (i.e., doors and windows) turn your container into a genuine home. Work with your contractor to add these based on your floor plan or ideal layout. If you still don’t have a precise floor plan ready to go yet, you can take inspiration from amazing container homes, restaurants, and galleries.
Boxhub can even provide ready-to-weld man doors — in addition to windows, vents, and more — to bring function and light to your container home. For more insight, check out Boxhub’s guide on what to expect from shipping container delivery.
Add a Roof
Shipping containers are delivered with a standard flat roof. However, you might want to install a sloped roof, both for additional vertical space and to drive rain/snow away from your property.
In your roof planning, you’ll also want to think about ventilation (e.g. pipes from your bathroom and kitchen) plus design elements (e.g. skylights) to ensure you don’t have duplicate work.
Frame the Interior
Shipping containers do lose some structural integrity when you cut openings for doors and windows. The solution is to add reinforcements, something you can plan with your contractor. This is particularly important when stacking containers on top of each other.
These reinforcements might mess with your floor plan a little bit. However, you can usually avoid too much inconvenience if you think about supports strategically (e.g. putting them where a kitchen cabinet might go. You lose a small bit of storage, but you can make that up elsewhere).
After the structure is stabilized, you can frame the interior–adding things like insulation, plumbing, and electrical work behind drywall.
Add Utilities
At this stage, you will want to add electrical and plumbing components into your shipping container home so that it’s fully functional.
There are a few other options to think about as well:
- Solar panels: Whether off-grid or you just want to lower your electricity bill.
- Outdoor bathroom facilities: If you want an off-grid or camping-style experience, you can build natural outhouses on your property.
- Well water connection and filtration: If you have well water rather than town supply, you’ll want to ensure it’s in working order and you’ve installed any necessary filters.
- Internet: Even in rural areas, an internet connection can be helpful for both entertainment and connectivity to the world.
Utilities can be what you make of them. An Airbnb host, for instance, might go as modern as possible. On the flip side, empty nesters who travel a lot or off-grid folks may not want every option, provided the essentials are met.
Insulate Your Container
Insulation is a very important step in building a shipping container home because it ensures you have climate control. Here’s what you need to remember:
- - Add insulation between the container walls and interior walls for warmth and climate control.
- - Add a vapor barrier to prevent water damage, mold, and mildew.
- - Ensure all new openings (e.g. windows) are sealed so no water and air leaks form.
You can use multiple different types of insulation such as polystyrene or batt—for more insight, check out Boxhub’s guide on insulating your container home.
Drywall, Flooring & Carpentry
The final step–adding interior walls and flooring–brings the container home to life. This is also when you can add cabinets, countertops, and other wooden features. If you’ve created a “tiny home,” you may want to install built-in furniture like murphy beds and tables to conserve space.
This is also your last chance to think about floor plan holistically. Once the cabinets are in, changing things again becomes much more difficult (and expensive).
Getting Ready and Moving In
With a complete, safe structure… it’s time to live your dream.
Finishing Touches
We recommend you clean and wipe the whole place after drywall installation—the dust can get everywhere. After that, though, you can move on to more fun things:
- Appliance installation: Finding the right compact appliances that give you what you need without taking up too much space.
- Decor and art: Painting walls and setting up visual room differentiation (even in a compact space).
- Furniture: One approach is to have one piece of big furniture (e.g. a comfy couch) and go small on everything else (e.g. side tables) to save space.
This is also the opportunity for your storage to come to life—Tupperware containers in closets, setting up a pulley system to the ceiling, or getting creative with flip-up dining tables or murphy beds.
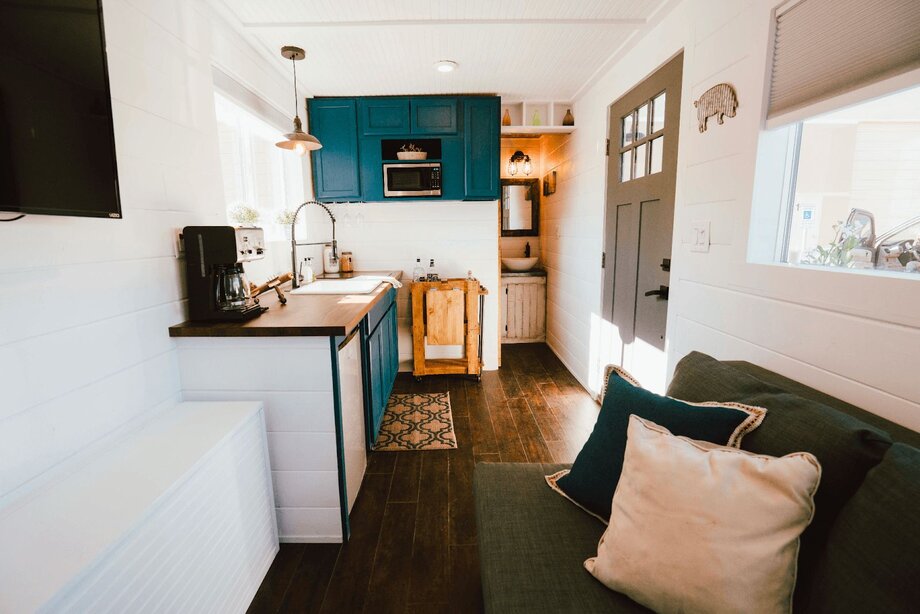
The interior of a shipping container home. Photo Credit: Alternative Living Spaces
Ship Your Stuff (And Gain Extra Storage If You Want)
Moving your stuff? Guess what… you can buy a moving shipping container to help transport all your things. And if you like it afterward, you can keep it on your property as extra storage — it will remain a traditional container with a big side door and strong walls to keep your items dry and safe.
This can be super helpful either if you opted for a tiny home or if you’re an Airbnb host, since the additional storage won’t take away from your in-container space.
Confirm Furniture Layout
Once everything is laid out… try to live in it for a bit. You might find you love it or you might find that couch is in the wrong place. These types of feelings are totally natural and are simply the result of starting a new way of living — don’t be afraid of it, try things out.
In certain areas, you are more or less stuck (e.g. appliance locations). However, you can play around with chairs, couches, TV placement, desks, and even bed areas.
Add Utilities
If you’re going to run an Airbnb on your property, don’t forget these extra steps:
- Photography: Get bright, clean photos of your new space.
- Platform setup: Completely fill out your profile and follow all of Airbnb’s new features (e.g. noting every amenity of your property with toggles rather than just words).
- Registration: If your jurisdiction requires it, register your Airbnb business.
- Marketing: Set up your host page on Airbnb or build your own website. You might also consider sharing more images on social media to drive business.
- Financials: Make sure you have a business bank account and continue to track both revenue and expenses — this is essential for tax purposes down the line.
- Turnover: Figure out how you will welcome guests and then clean in between guest departure and arrivals.
The Final Step: Celebrate!
We like to think this step is non-negotiable.
You can celebrate in any way that works for you: pop some champagne or wine, get your favorite takeout, treat yourself (whatever that means for you—a massage, a specialty coffee, an afternoon off, etc.), or a high-five with a partner then breathe in your new space for a moment.
It’s not about spending money per se; it’s about marking the start of your new adventure.
Whether you’re reading this guide in anticipation of building your shipping container home or if you’re already going through the journey—we hope this was a helpful overview of the process.
As you get more into your project, you’ll likely need deeper resources to answer questions as they come up. Or, if you want to be prepared, you can pre-read all the guides on Boxhub’s blog.
Some recommended reading includes:

About Nina Barango
Nina Barango is an experienced content marketer and container expert with a proven track record in the tech and logistics industry. Having worked with various startups and SMEs, she bridges the world of marketing, tech and shipping containers. When she's not creating content that'll revolutionize global container trade, you can find Nina reading a book or mastering her video editing skills.




Continue Shopping
Loading cart